Mailchimp is great and WordPress is great. What’s not great is having to create a new campaign and newsletter every time you publish something interesting. Wouldn’t it just be better if Mailchimp automatically sent each of your blog posts to your subscribers? In this post, you can find out how to use Mailchimp to send each new blog post without lifting a finger.
How to set up a Mailchimp RSS campaign
I am assuming that you already have a Mailchimp account and list of subscribers set up. If not, you can refer to this article on how to get started with Mailchimp.
To send blog posts automatically, we’re going to use Mailchimp’s RSS campaign feature. RSS (Real Simple Syndication) makes your WordPress content available via a feed. Whenever this feed is updated, Mailchimp will grab the new content and automatically insert it into a newsletter.
It works just like any other campaign, in that it will get sent to everyone on a specified list; the only difference is that it’s automatic.
Get your WordPress blog feed
The feed you’ll need to use depends on what content you wish to share automatically. Here are some possibilities using this website’s URL:
- https://wisdomplugin.com/feed/ – All content
- https://wisdomplugin.com/category/marketing/feed/ – Content from the Marketing category only
- https://wisdomplugin.com/tag/mailchimp/feed/ – Content tagged with ‘Mailchimp’
- https://wisdomplugin.com/author/catapultthemes/feed – Everything written by me
So you could potentially set up different Mailchimp campaigns by author, category, tag, etc. For now, we’ll just keep it simple and use the URL for all content – https://wisdomplugin.com/feed/.
Create a new Mailchimp campaign
Assuming you’ve got a list of subscribers already set up, you now need to create a new campaign. Sign in to Mailchimp, click on Campaigns in the top left of your dashboard, then click ‘Create Campaign’.
At the moment in Mailchimp, you’ll see a screen like this (though Mailchimp seem to change their interface fairly often so don’t be freaked out if the options are presented differently):
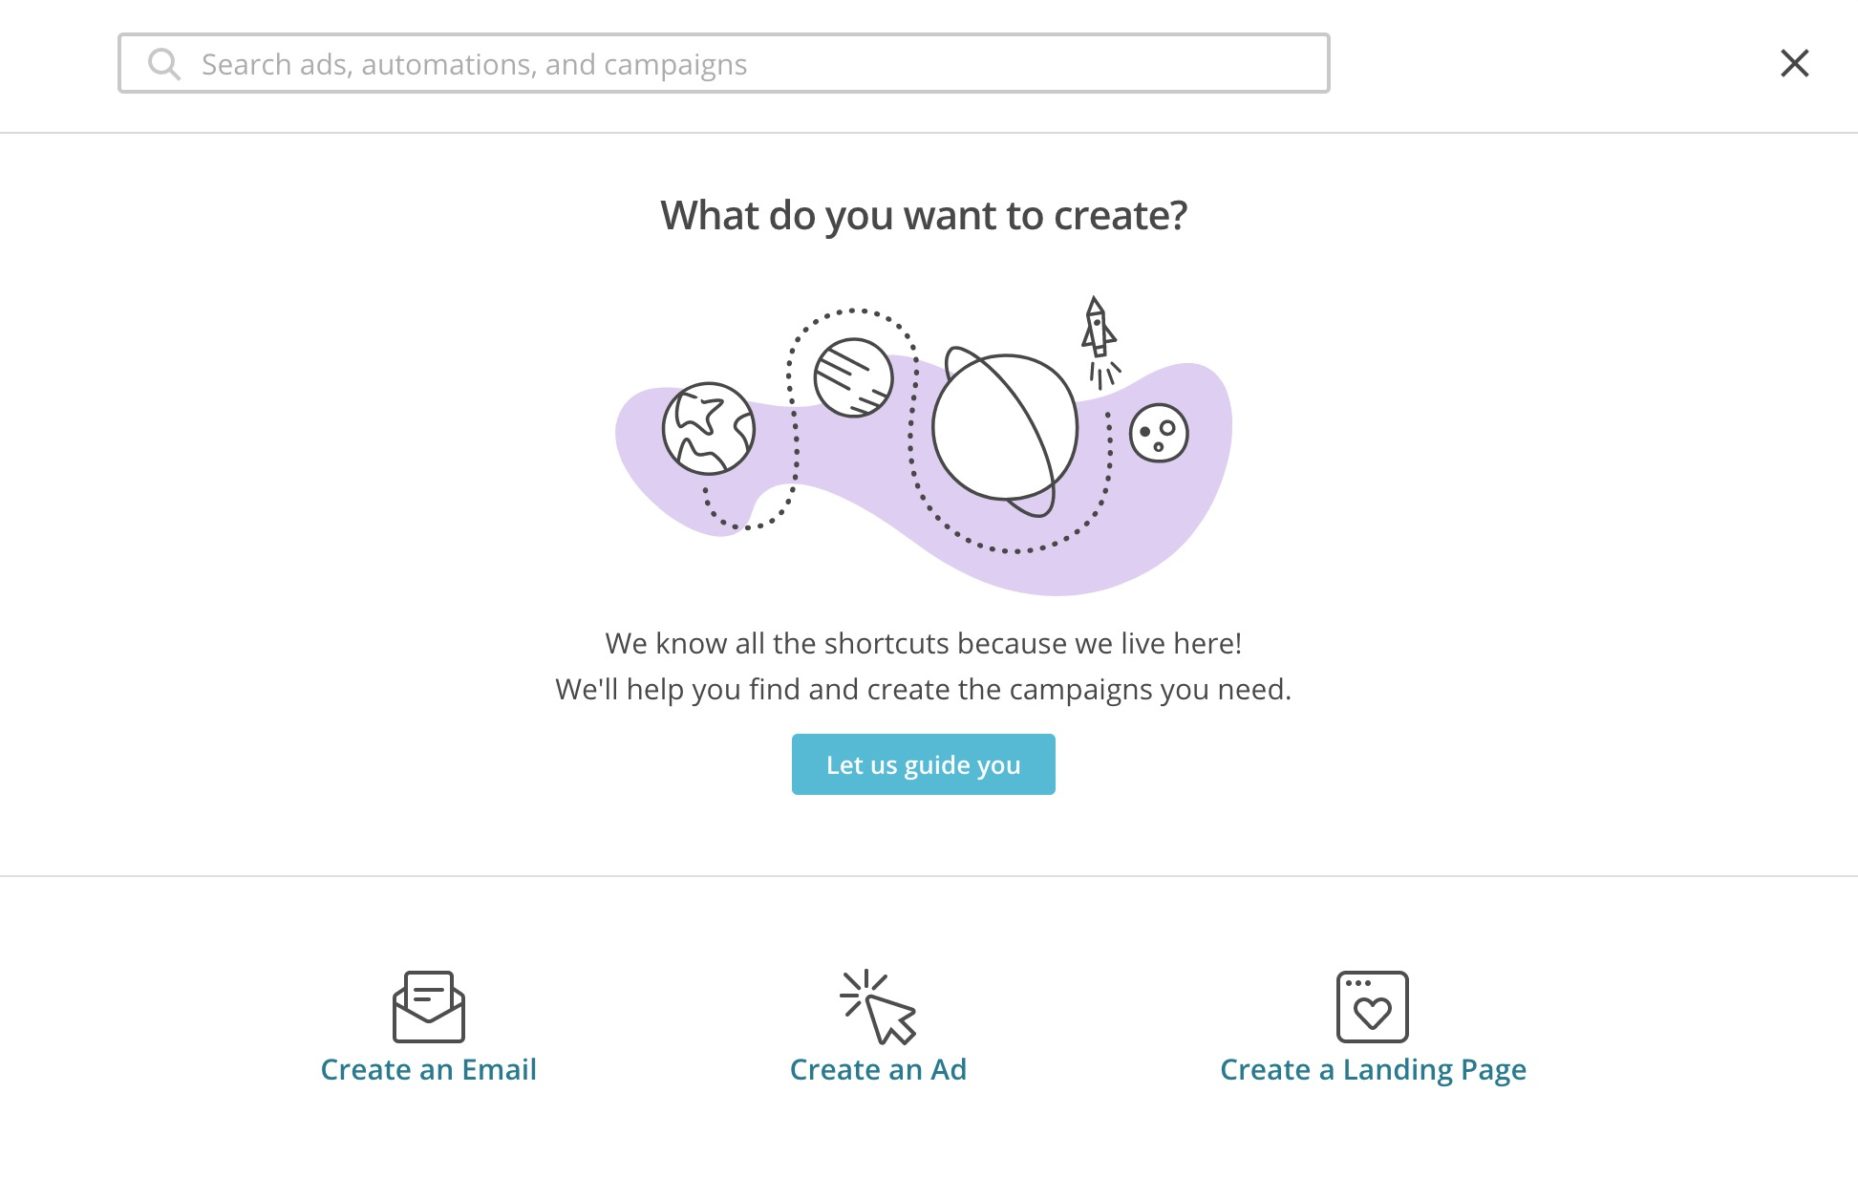
Choose the option to ‘Create an Email’.
From the next screen, choose the ‘Automated’ tab then click the ‘Share blog updates’ button: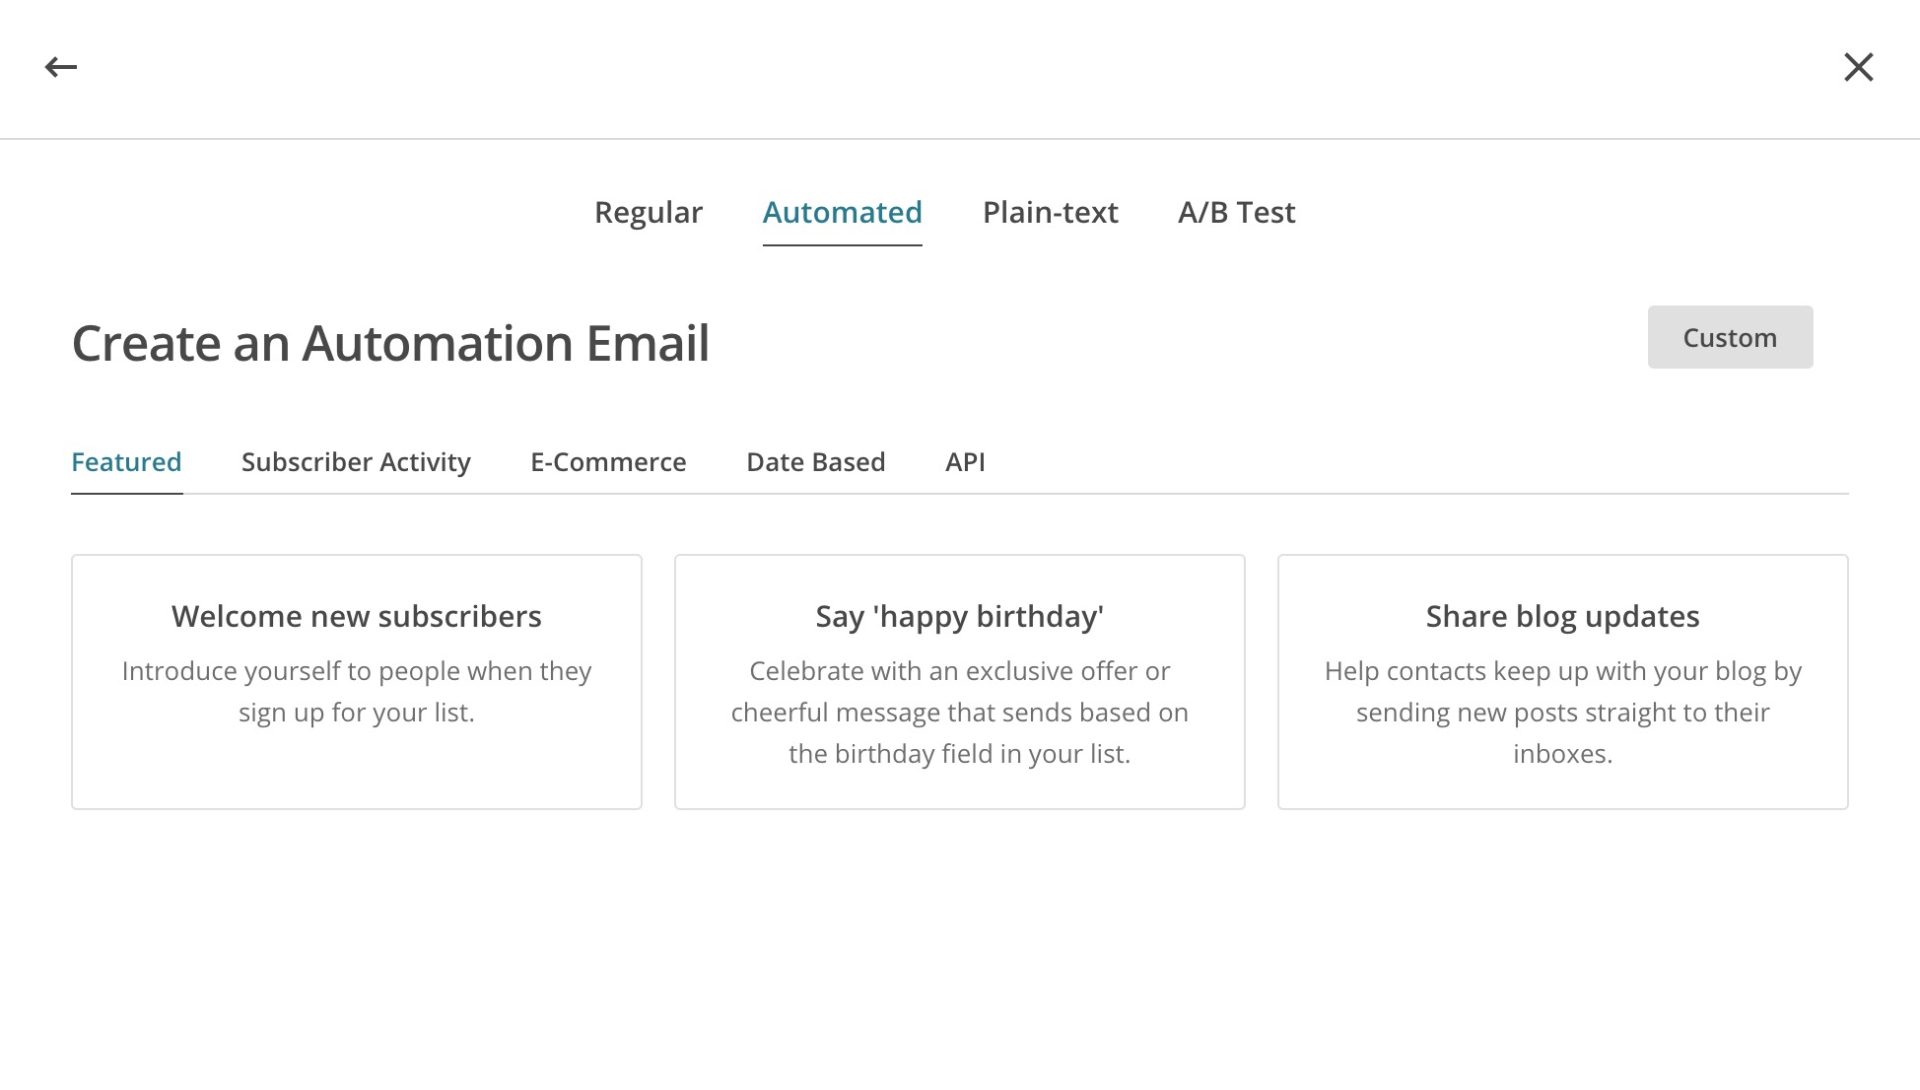
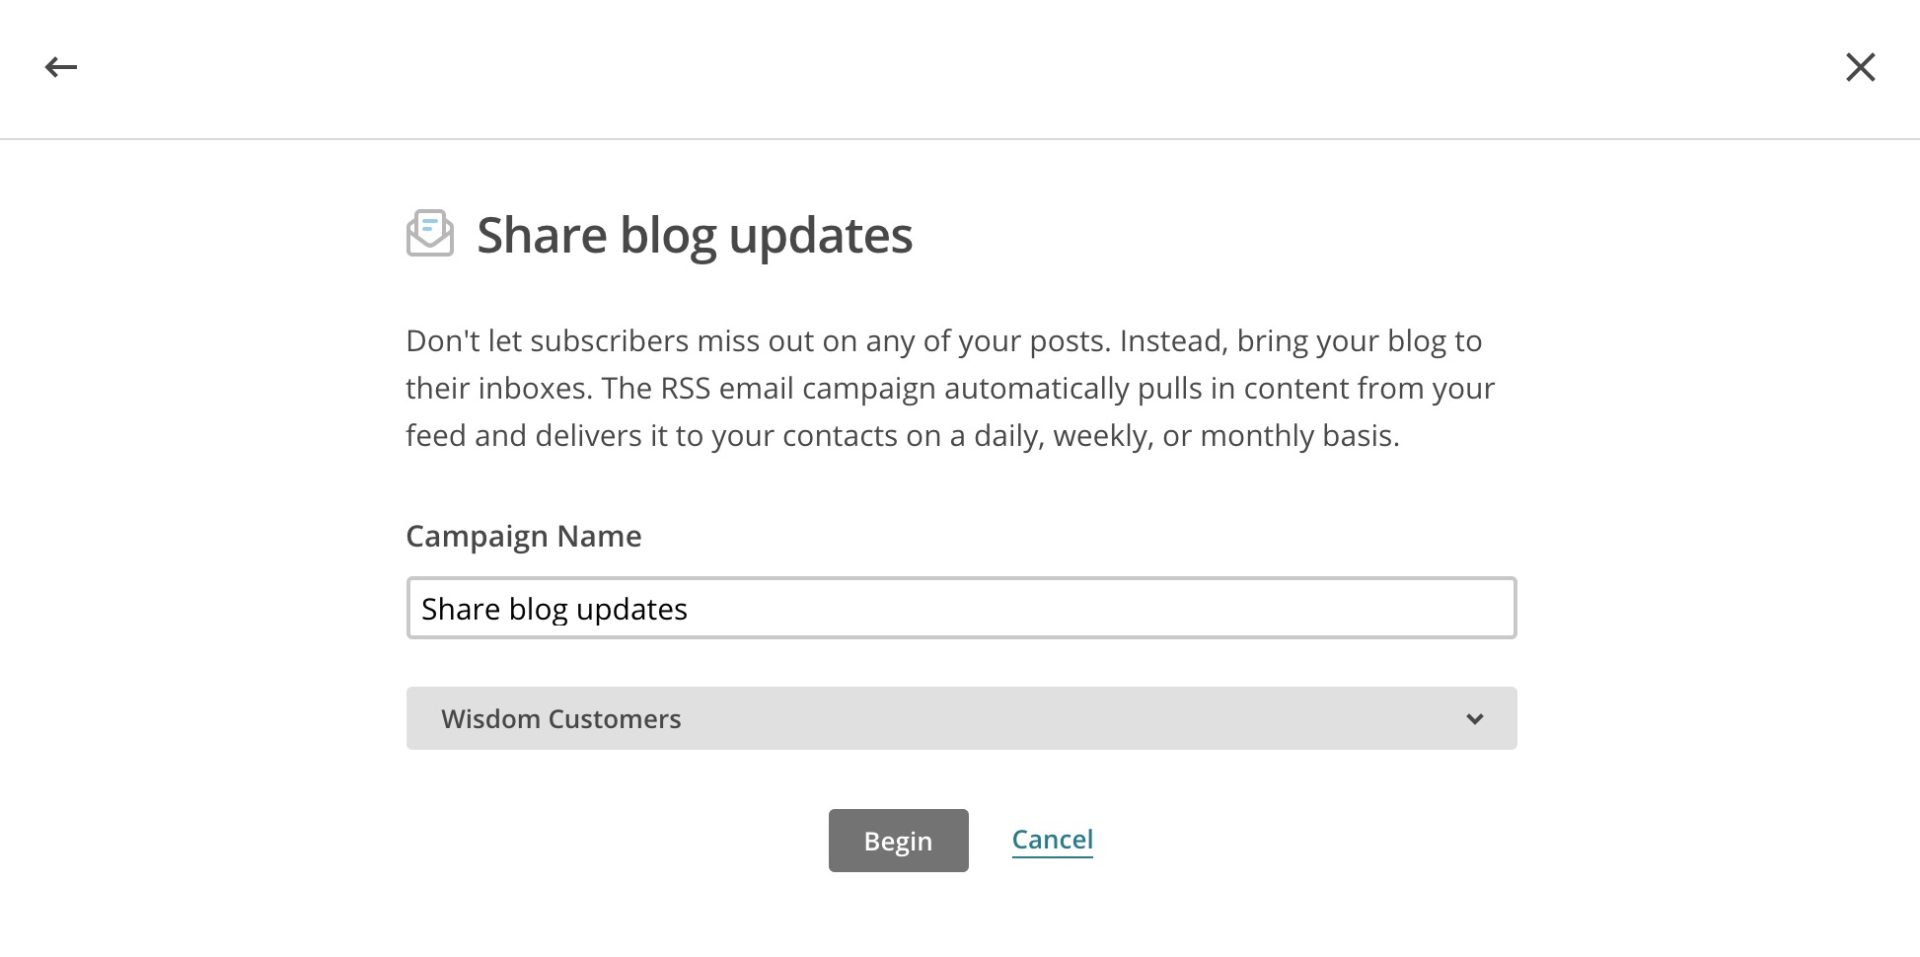
Finally, from the next screen, enter a name for your campaign and choose the list you’d like to send emails to. Click the ‘Begin’ button.
You’ll go through to a new screen called ‘RSS feed and send timing’:
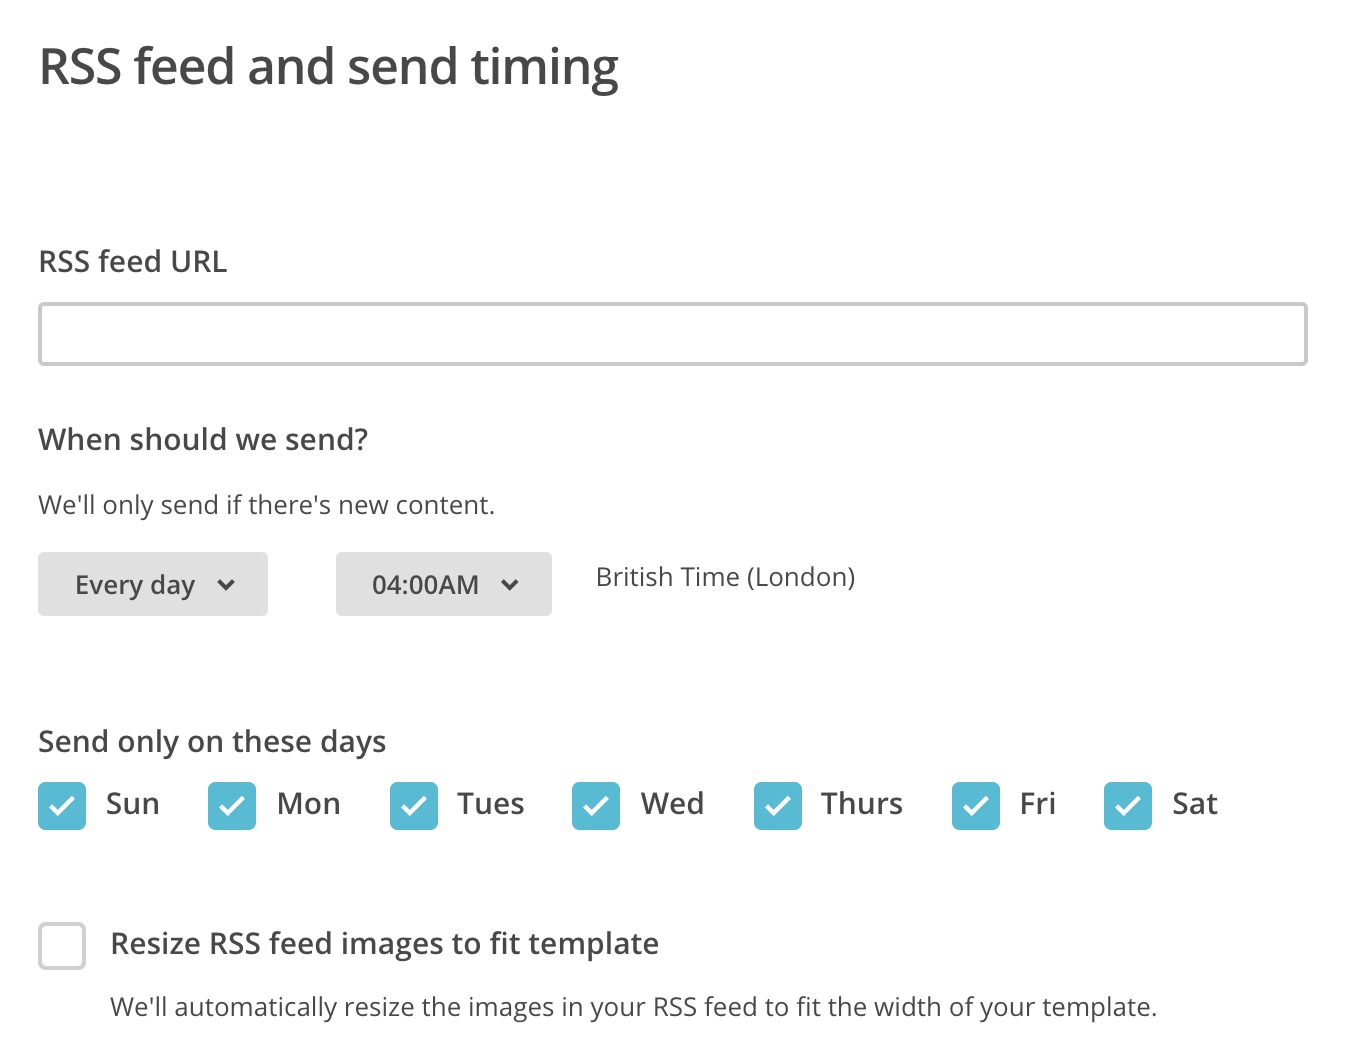
Enter the feed URL that you’re planning to use into the first field. Then use the next fields to set timings for when you’d like emails to be sent.
Finally, I recommend selecting the ‘Resize RSS feed images to fit template’ option so that your images are the correct size for the email.
If you’re used to setting up Mailchimp campaigns, you’ll now be on familiar ground. The next screen is the Campaign Info screen:
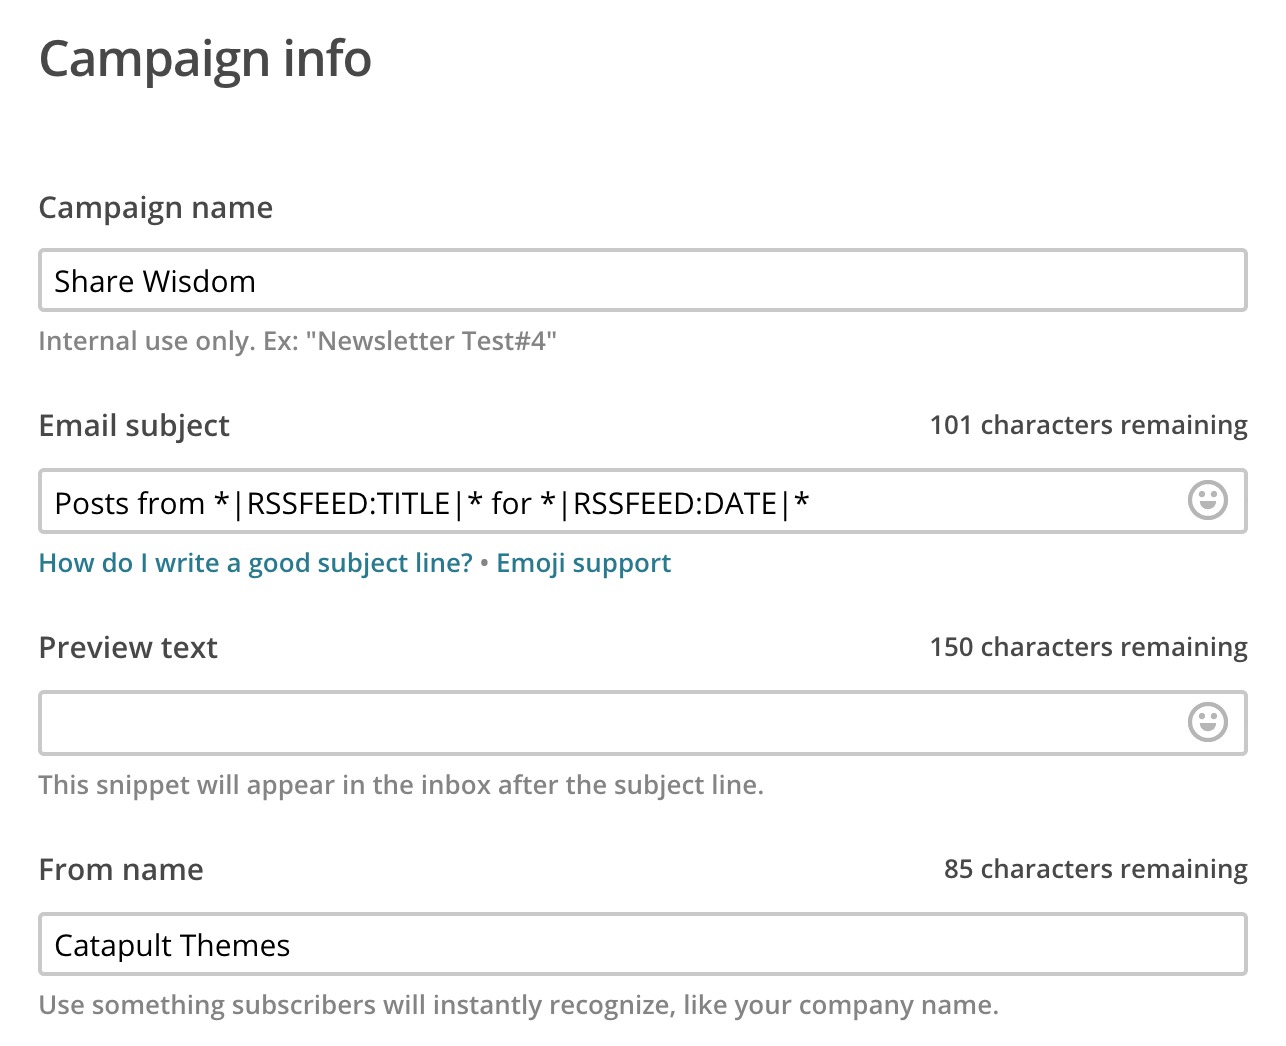
Customizing the Mailchimp subject line using RSS tags
At this point, you might want to give some thought to how your emails are going to look in your subscribers’ inboxes. The ‘From name’ field is standard – just your own name or your company name – but the ‘Email subject’ field is slightly different because it’s dynamic.
By default, Mailchimp uses the slightly messy Posts from *|RSSFEED:TITLE|* for *|RSSFEED:DATE|* as its subject line. To your users, this will appear as Posts from Your Website Name for 02/02/2018 which is accurate but not very snappy.
I suggest that, assuming you’re only likely to be sending one blog post at a time, that you use
*|RSSITEM:TITLE|* in the ‘Email subject’ field instead. This will just use the title of your blog post in the subject line.
You can find out more about Mailchimp merge tags here.
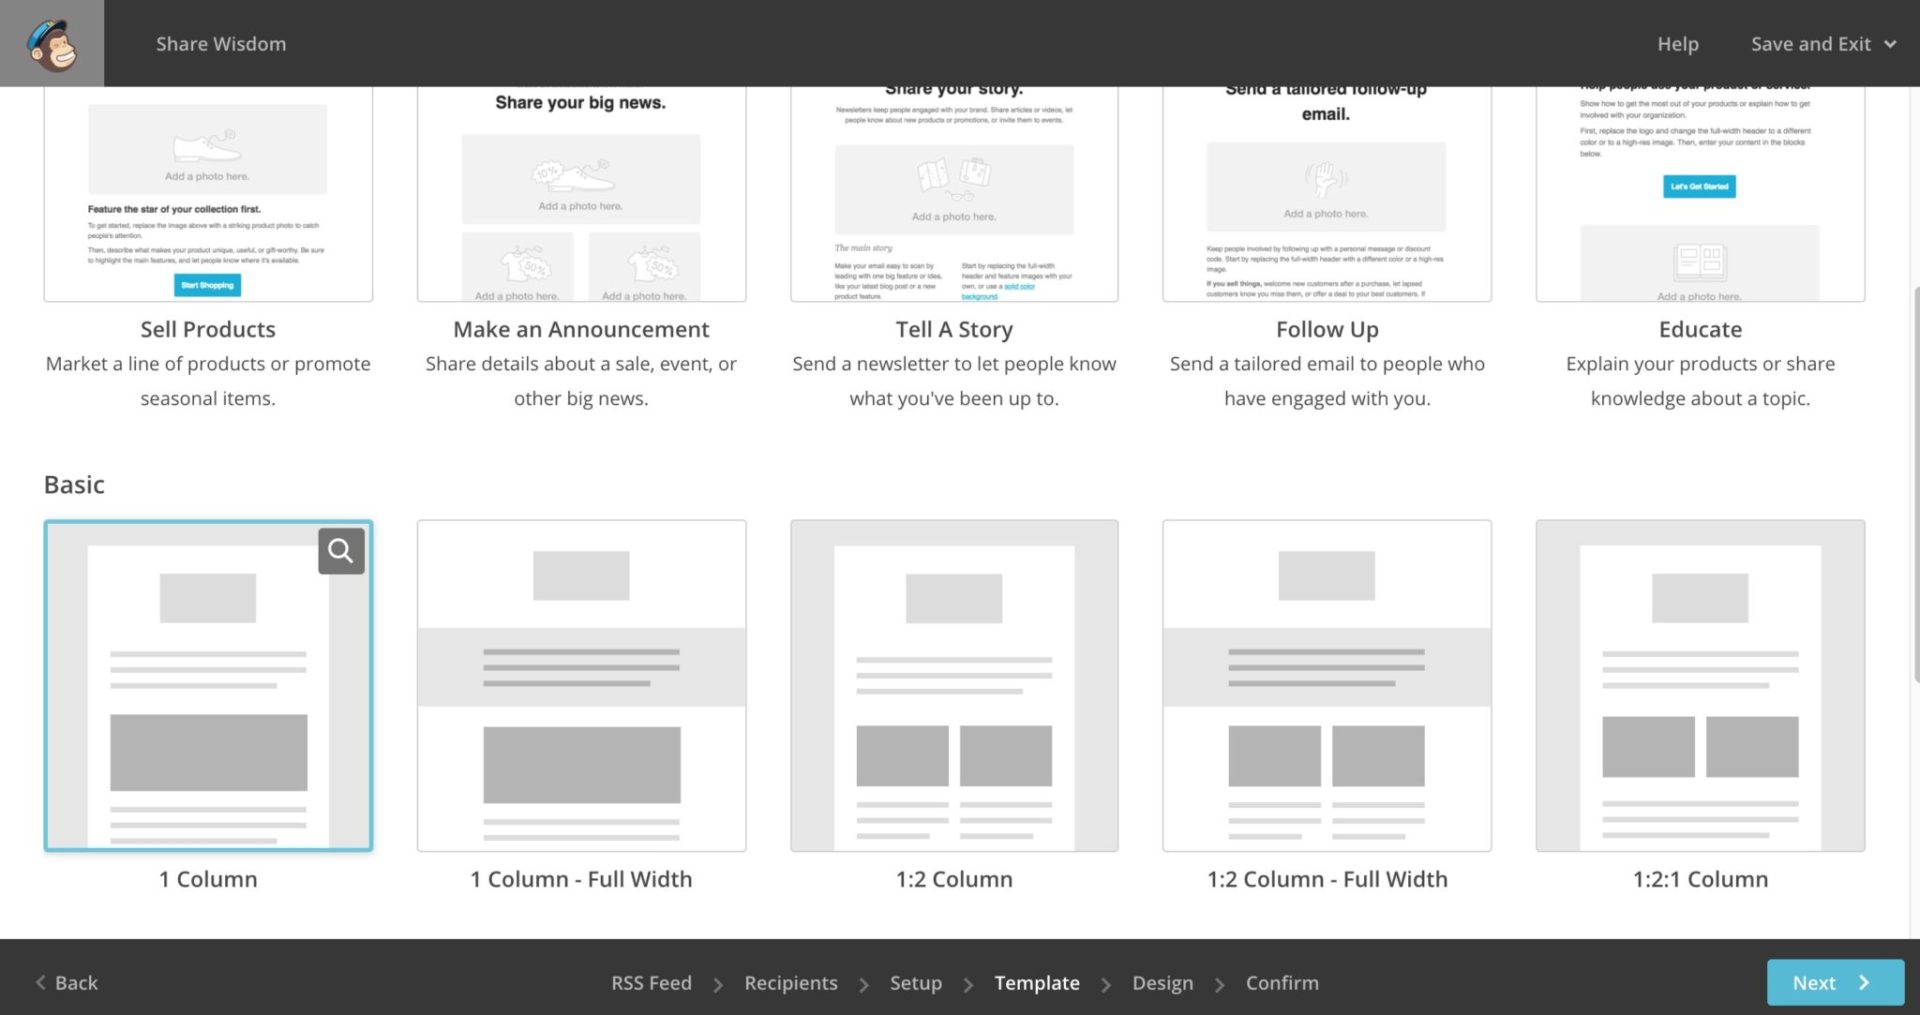
Select a template
Now you can choose a template for your newsletter. I suggest using the Basic 1 Column template:
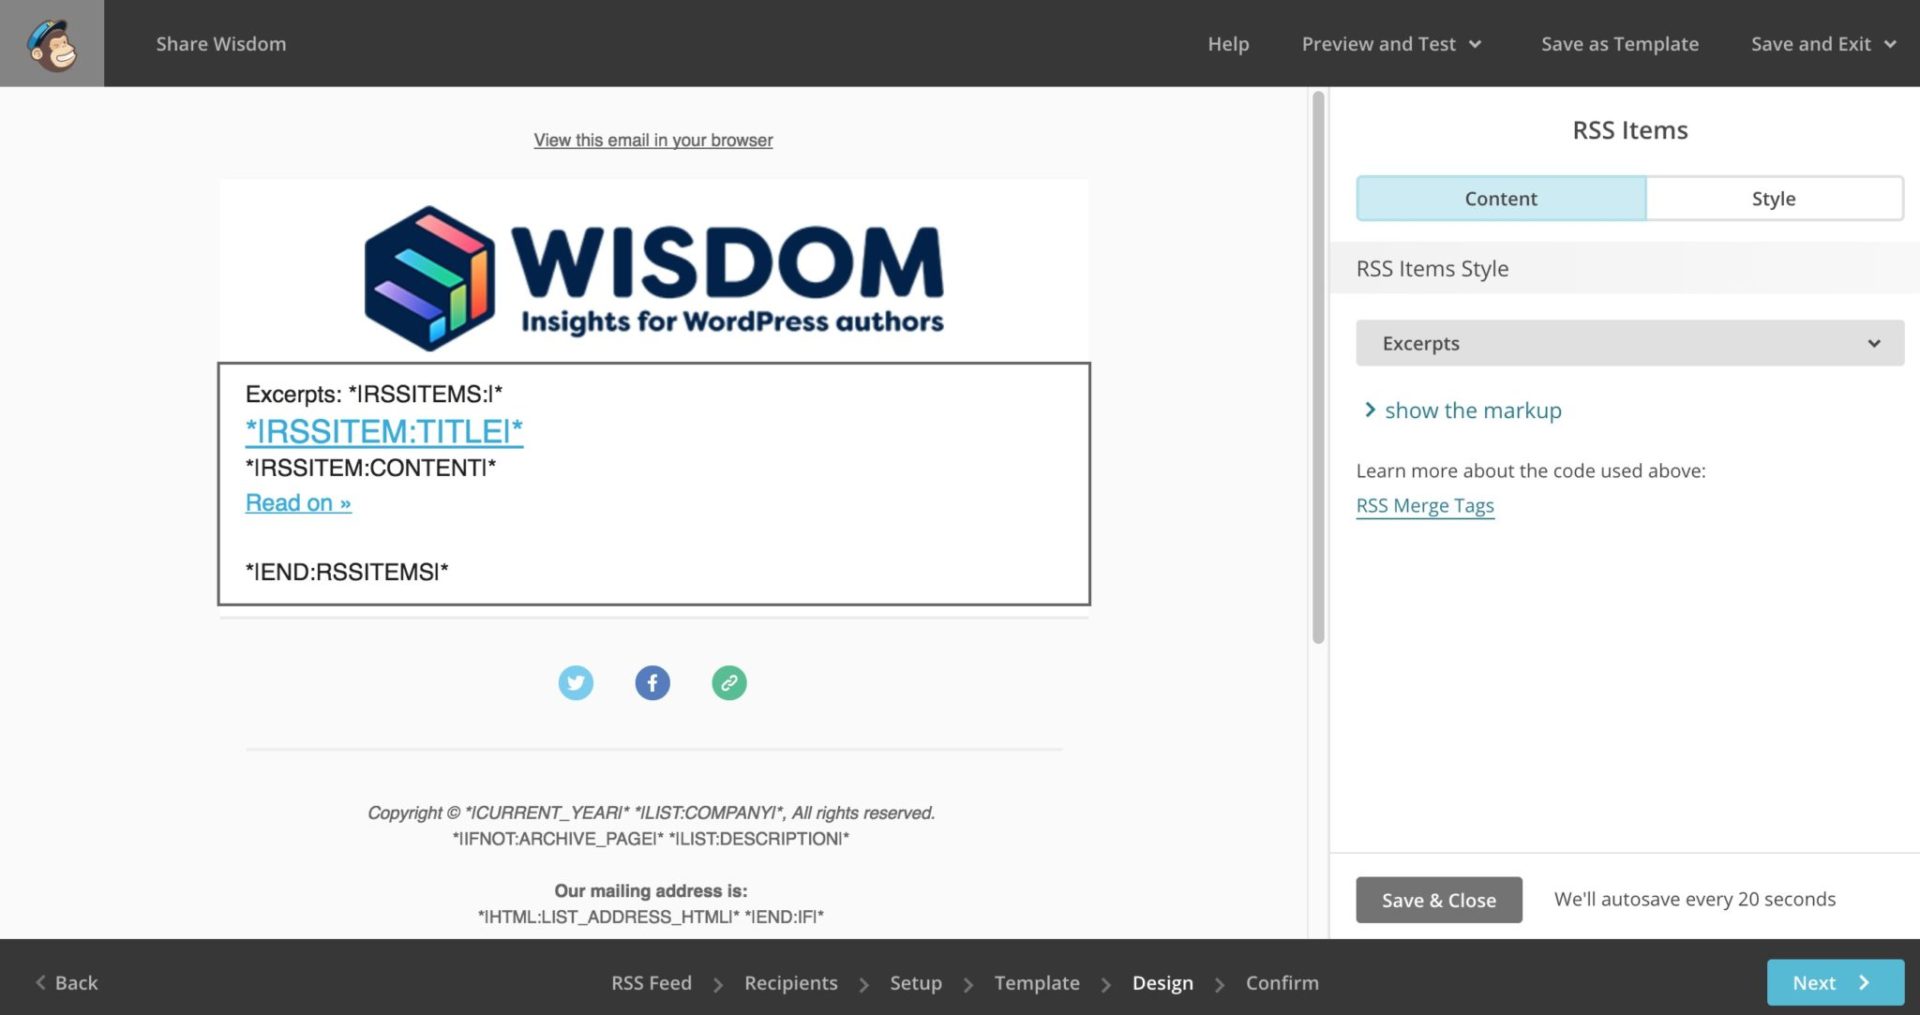
Design the email
This is probably the trickiest bit of the whole process and, even then, it’s still pretty simple. By now, you should be looking at the standard Mailchimp newsletter design screen.

Before you add the RSS content, you can edit the starter content. Add a logo to the image field at the top of the page and edit or delete the text content below it.
Then, you need to drag the content block called ‘RSS Items’ over into the main content area:

You’ll be left with something like this:
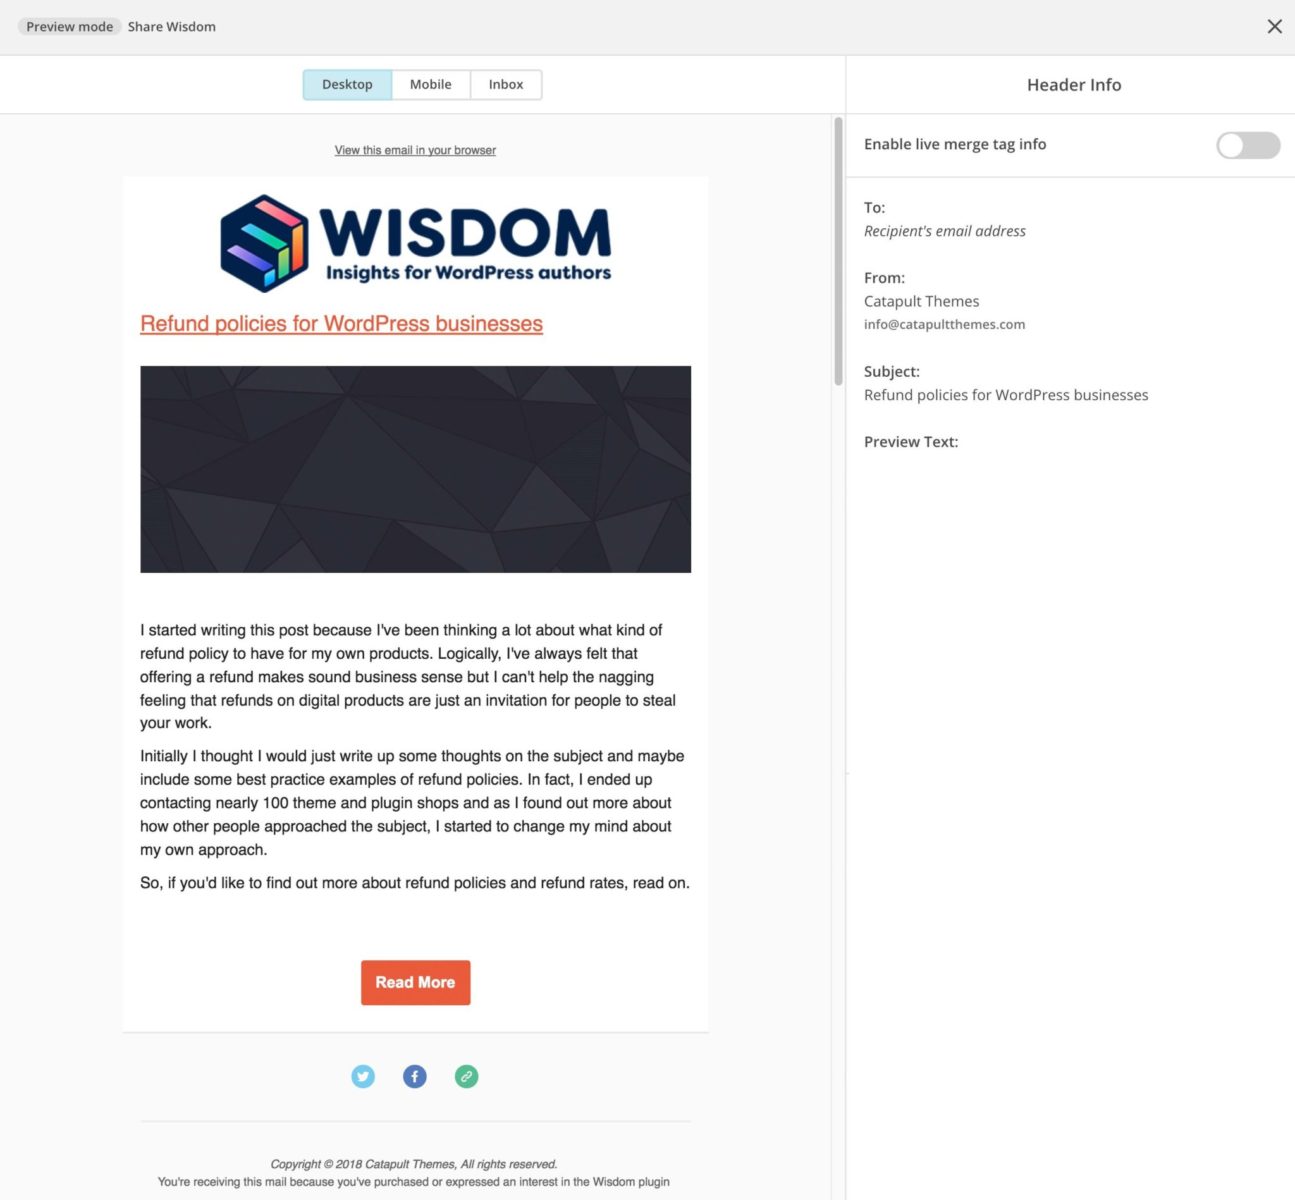
At this stage, you have an automated campaign set up and ready to go. You can preview the email to see something like this:

This is, more or less, how your email will appear to your subscribers when they open it. (Note the Header Info on the right of the screenshot above – the Subject line is the name of the post as we specified earlier.)
However, there’s still a few options left that will help to spice up your final email.
Close the preview and click on the RSS Items content block to edit it:

Click the dropdown list in the RSS Items Style section in the right hand panel. You can choose from the following:
- Excerpts – this will add your blog post title (with link) and excerpt to the email
- Titles Only – this will only add the title and link
- Full Content – this will add the entire content of your post to the email
- Custom – this allows you to play around with the content
We’ll take a quick look at the custom option below.
Custom RSS styles and content
You can edit the RSS tags so that only the content you want will appear in your emails – but be careful as it’s easy to break things here. If you do break anything, just delete the RSS Items block and re-add it.
For my newsletter, I don’t feel like I want the recent articles listed – I just want some content from the most recent article. So I chose Custom and deleted the ‘Recent articles’ section. I also removed some of the other default content like the link to ‘Read in browser’:
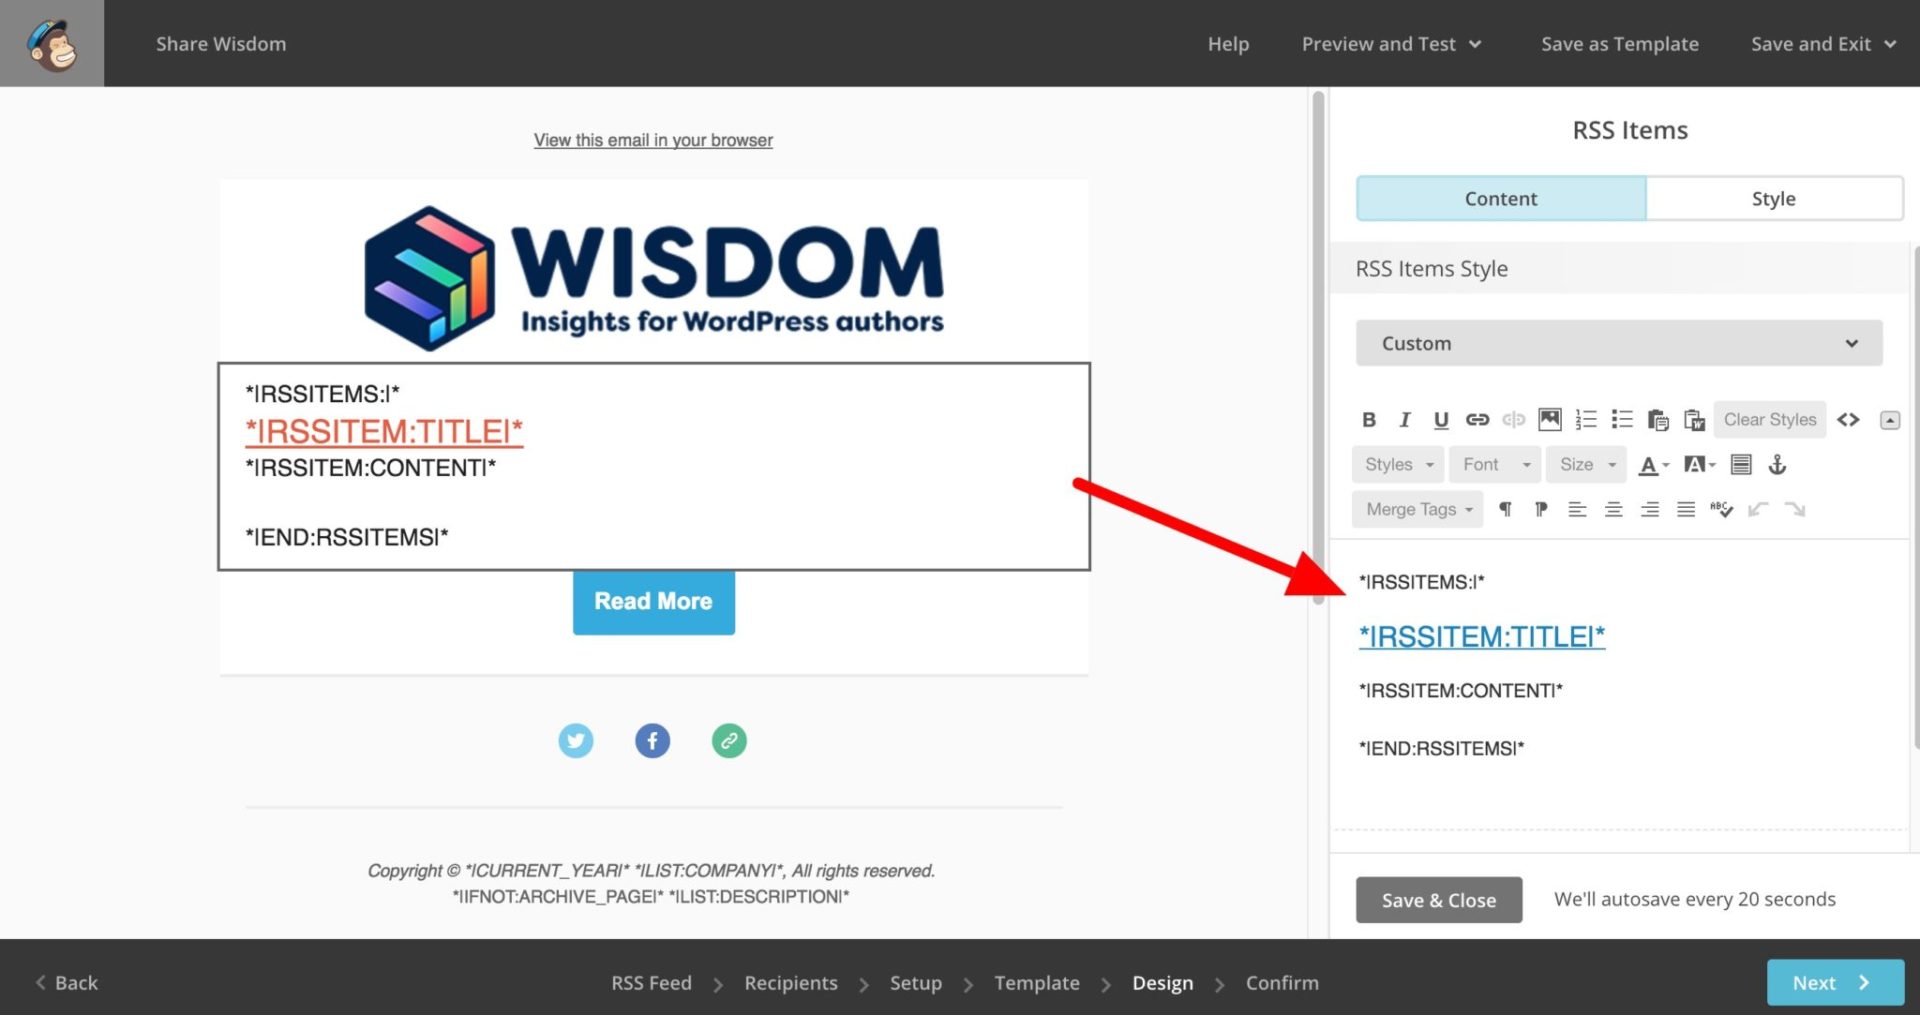
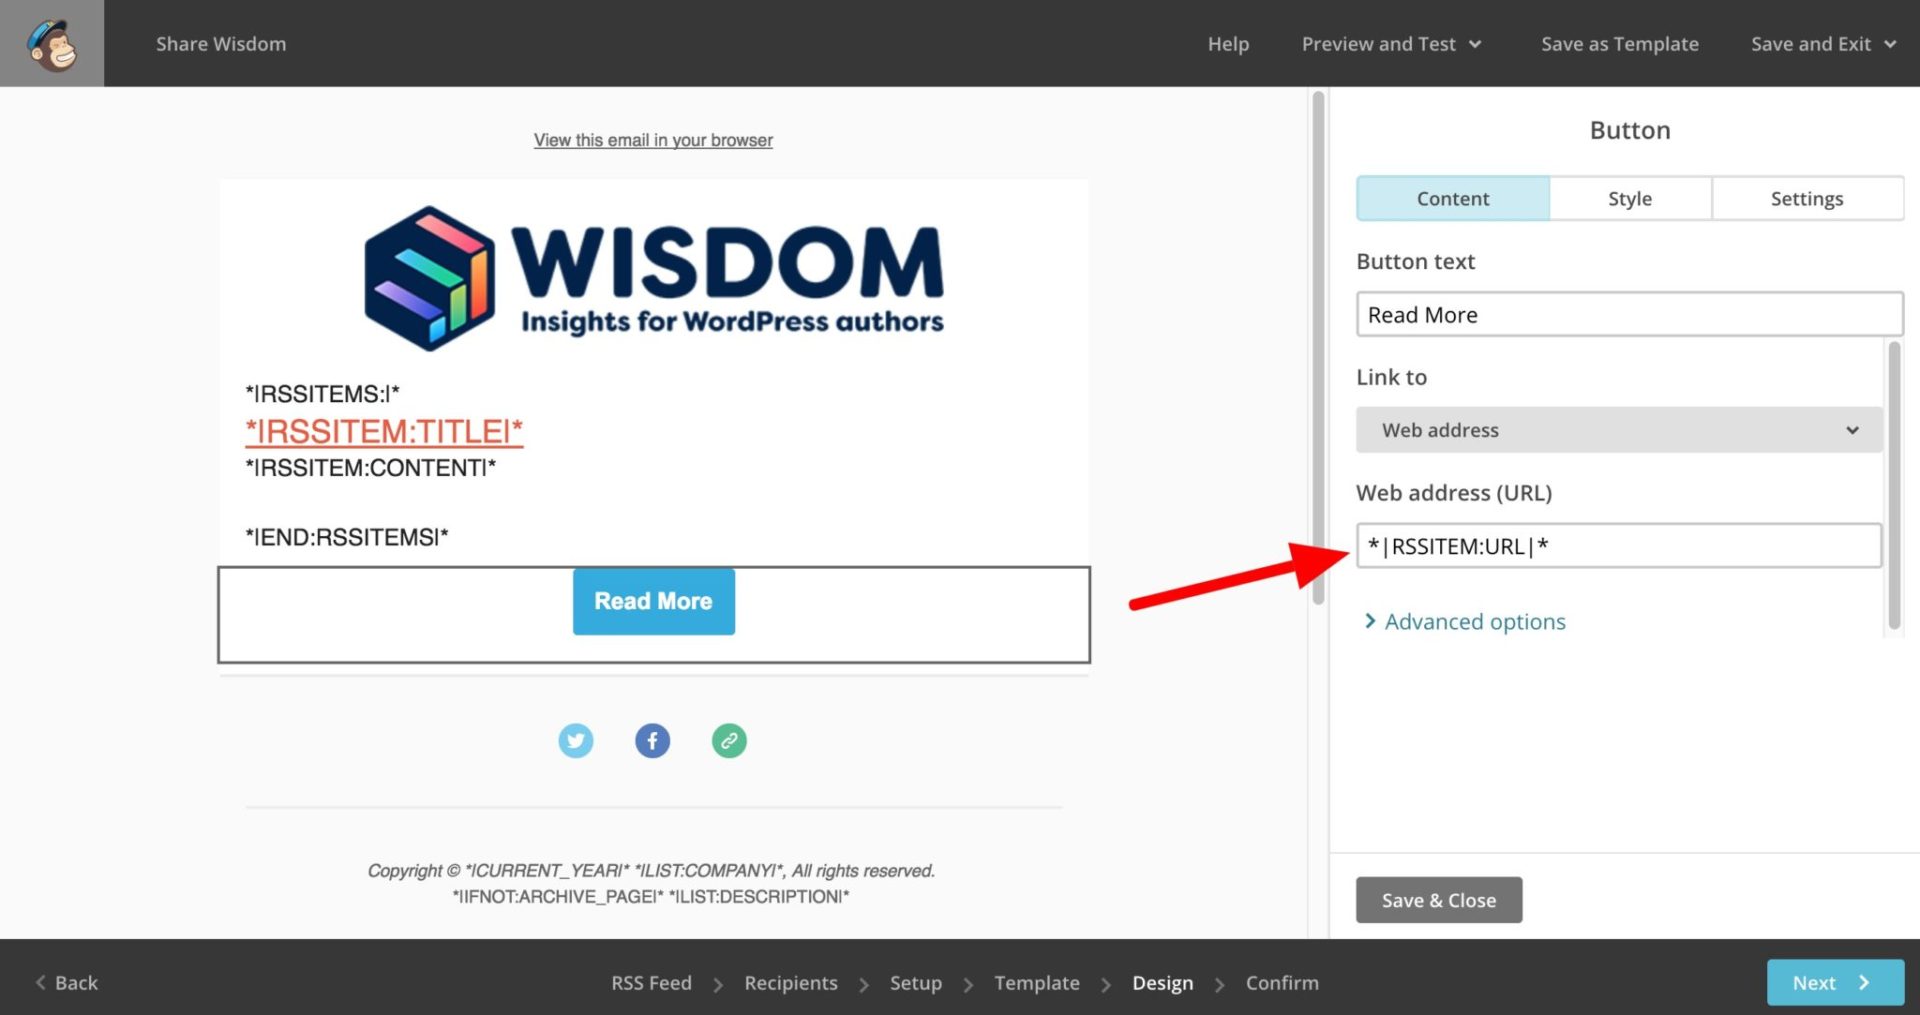
I also decided to add a custom button instead of the link. To create a custom button to your feed URL, add a Button content block and use the *|RSSITEM:URL|* tag for the URL.
I can preview this now and it’s starting to look how I want it:

There are only a couple of things I want to change now.
Add the featured image to Mailchimp feed
There is a plugin that allows you to automatically a blog post’s featured image to your RSS feed so that it will appear in Mailchimp. However, the plugin is quite bloated and is one of those plugins that takes up a massive amount of real estate in your dashboard, despite only doing a very simple task.
Instead, I’ve written a short code snippet that you can add as a plugin to your site that will include the featured image in your feed. You can download the plugin from Github.
| <?php | |
| /** | |
| * Plugin Name: Improve WP Feed for Mailchimp | |
| * Plugin URI: https://wisdomplugin.com/how-to-automatically-export-wordpress-posts-to-mailchimp | |
| * Description: Add a featured image to your feed and use the More tag instead of excerpt | |
| * Author: Catapult Themes | |
| * Version: 1.0.0 | |
| */ | |
| /** | |
| * Get the post content up to the More tag | |
| * @see https://codex.wordpress.org/Function_Reference/get_extended | |
| */ | |
| function atp_get_content_to_more_tag() { | |
| global $post; | |
| $content_main = get_extended( $post->post_content ); | |
| $content_main = $content_main['main']; | |
| return wpautop( $content_main ); | |
| } | |
| /** | |
| * Filter the content feed to use main content instead of excerpt | |
| * Add a featured image | |
| * @see https://codex.wordpress.org/Plugin_API/Filter_Reference/the_content_feed | |
| */ | |
| function atp_filter_content_feed( $excerpt ) { | |
| // Add featured image? | |
| global $post; | |
| $excerpt = atp_get_content_to_more_tag(); | |
| if( has_post_thumbnail( $post->ID ) ) { | |
| $excerpt = get_the_post_thumbnail( array( 'style' => 'max-width: 600px; width: 100%; height: auto; margin: 30px 0;' ) ) . $excerpt; | |
| } | |
| return $excerpt; | |
| } | |
| add_filter( 'the_excerpt_rss', 'atp_filter_content_feed', 999, 1 ); | |
| add_filter( 'the_content_feed', 'atp_filter_content_feed', 999, 1 ); |
Returning content before the more tag instead of the excerpt in your RSS feed
Now, finally, there’s only one more thing I want to do.
Because of the way my theme works, I felt that the excerpt was too short to provide enough of a lead-in to the article. Instead, the content to the <!-- more --> tag was more appropriate so I created a short code snippet to filter the excerpt and replace it with the content before <!-- more -->.
This snippet is part of the plugin I mentioned above.
Now, when I preview the email, it looks like this:
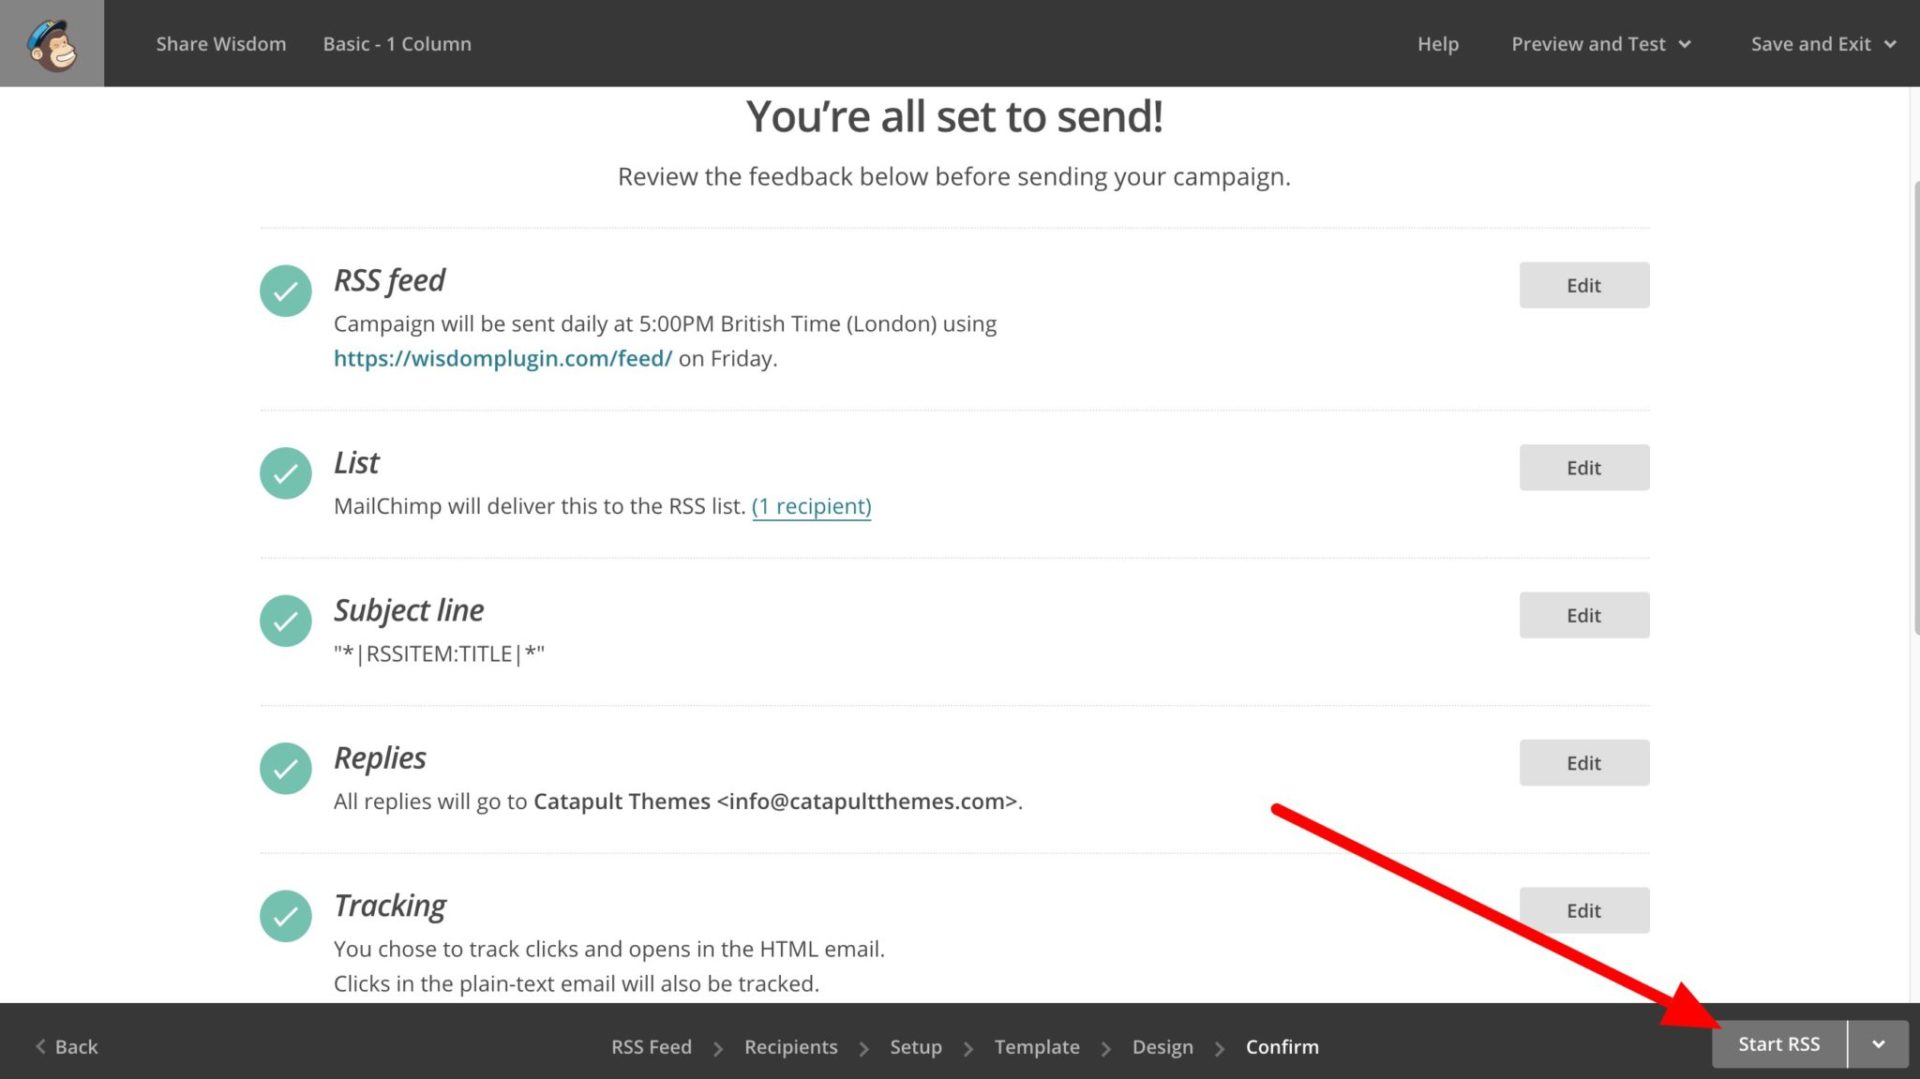
It’s ready to go. Remember to update the links in the social media icons in the footer. Then click through to the Confirm page. Just hit ‘Start RSS’ when you’re ready to go:
Sign up now
If you’d like to see this in action, just use the sign-up form in the sidebar or footer to subscribe to my email list. You’ll receive new articles automatically.
THX for this article and for the superslim plugin. Unfortunately the featured image is not displayed in my MailChimp-Mail…
Any idea?
ou can use also my MailOptin to automatically send your post as a newsletter to your MailChimp list every time you publish a post. It also does email digest too. https://mailoptin.io/article/new-post-notification-mailchimp-email-list/
There is a free version on WP.org
Great post Gareth.
Thanks so much! I followed your steps and am much happier with the appearance of my MailChimp RSS feed.
Not working for me either. Used this in my functions.php file instead:
function featuredtoRSS($content) {
global $post;
if ( has_post_thumbnail( $post->ID ) ){
$content = ” . get_the_post_thumbnail( $post->ID, ‘small’, array( ‘style’ => ‘display:block;max-width:400px;width:100%;border-radius:10px;margin:0 15px 15px 0;’ ) ) . ” . $content;
}
return $content;
}
add_filter(‘the_excerpt_rss’, ‘featuredtoRSS’);
add_filter(‘the_content_feed’, ‘featuredtoRSS’);
A really helpful post – thank you! Clear and well written.
Great post and walkthrough thanks.
Really helpful, completely happy that my Post is auto sending to my Subscribers
Thank you. Good job!
This is really really helpful and explained so clearly. I’ve been struggling with this feature for days….. THANK YOU !
Wait and see how it will work tomorrow morning for my first RSS email.